
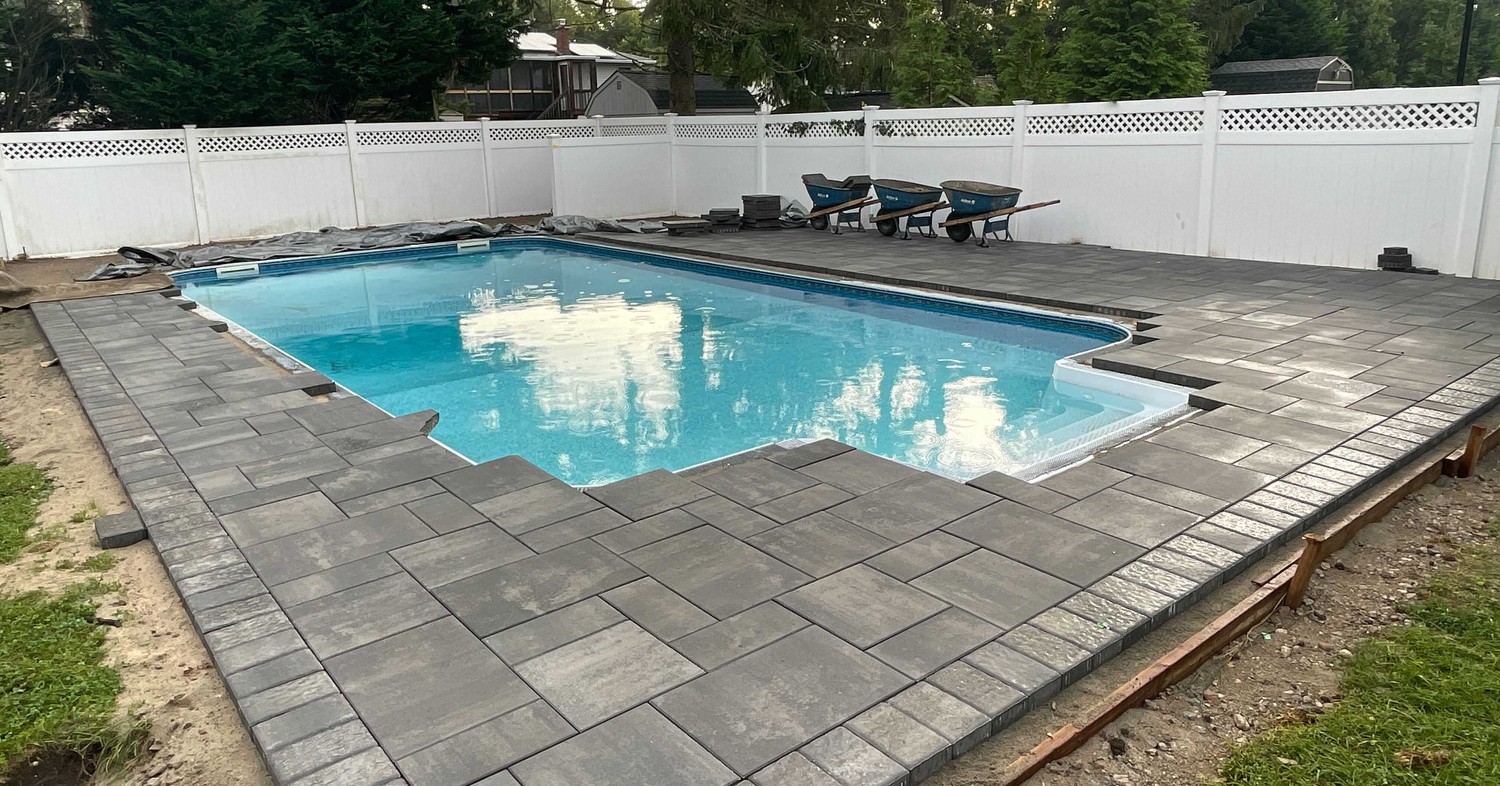
How to clean and maintain your paver patio is the question most Nassau County homeowners ask after they have enjoyed their first full season on a new installation and start noticing the subtle changes that come with a year of use, weather, and outdoor living. Paver patios built with quality materials and a proper base are designed to last 25 years or more — but that lifespan assumes the surface receives the basic maintenance it needs to prevent joint degradation, biological growth, and sealer breakdown over time. This guide covers the complete paver patio maintenance process in a practical sequence: regular cleaning, joint sand care, paver sealing, stain removal, and annual inspection — with specifics on the Cambridge Pavingstones with ArmorTec that we install across Nassau County.
Table of Contents
Quick Answer: How to Clean and Maintain Your Paver PatioHow to clean and maintain your paver patio on a standard annual schedule: sweep and rinse the surface monthly during the season, spot-treat stains within 48 to 72 hours of occurrence, inspect and refill polymeric joint sand each spring, apply sealer every two to three years, and do a full structural inspection annually. Most paver patio maintenance tasks are DIY-friendly. The one task most homeowners under-prioritize is joint sand management — keeping joints filled is the single most effective thing you can do to extend paver patio lifespan.
How to Clean and Maintain Your Paver Patio: Monthly Routine
How to clean and maintain your paver patio starts with understanding the routine maintenance that prevents buildup rather than just reacting to visible problems. Monthly care during the outdoor season (May through October in Nassau County) requires about 20 to 30 minutes and prevents the kind of staining, biological growth, and surface buildup that become genuinely difficult to remove after one or two seasons of accumulation.
The basic monthly routine: sweep the surface with a stiff push broom to remove loose debris, paying particular attention to joints where organic material accumulates and creates conditions for weed germination and biological growth. Follow with a garden hose rinse to clear dust, pollen, and surface dirt. For paver patio maintenance on surfaces with outdoor cooking equipment or dining areas, rinse after each use to prevent grease and food residue from absorbing into the paver surface. Grease stains that are not addressed promptly can require aggressive degreaser treatment later — a few seconds of rinsing immediately after a barbecue prevents hours of stain removal work.
Monthly sweeping also monitors joint condition between annual sand replacement cycles. If you notice joints where the sand has dropped more than 1/4 inch below the surface or where weeds are beginning to establish, addressing those specific spots before they spread saves time and preserves the paver patio maintenance investment you made in spring. Our Nassau County paver patio installation page covers the Cambridge Pavingstones and materials we use, including ArmorTec’s stain resistance properties that affect how aggressively you need to treat surface spills.
How to Clean and Maintain Your Paver Patio: Seasonal Deep Clean
How to clean and maintain your paver patio beyond routine monthly care requires a more thorough seasonal cleaning in spring (after winter) and optionally in fall (before winter). The spring deep clean addresses everything that winter deposited on the surface. The fall clean removes summer organic buildup before it sits on the surface through winter and creates harder-to-remove staining in spring.
Spring Deep Clean Process
Start the spring deep clean after the surface has dried from any remaining winter moisture. Sweep the entire surface first. For biological growth — algae, moss, or lichen that has established on shaded areas during winter — apply a paver-safe biological cleaner and allow it to dwell for the time specified by the product. Scrub with a stiff-bristle brush and rinse thoroughly. For general surface cleaning after biological treatment, use either a garden hose with a spray nozzle or a pressure washer set to 1,500 to 2,000 PSI with a 25 to 40-degree fan tip. Maintain 12 inches of minimum distance from the surface and keep the nozzle moving continuously. After cleaning, inspect joints and refill any that have degraded. Allow 24 to 48 hours of drying time before applying new joint sand or sealer.
Stain Removal by Type
Paver patio maintenance for specific stain types requires different approaches because different contaminants respond to different treatments. Using the wrong cleaner can set a stain or damage the paver surface, so matching the treatment to the stain type is important.
- Grease and oil stains: Apply a commercial degreaser or dish detergent directly to the stain, scrub with a stiff brush, and rinse. For set-in grease from multiple seasons, a baking soda paste applied overnight before scrubbing often breaks down residual oil that surface degreasing misses.
- Rust stains: Use a commercial oxalic acid-based rust remover formulated for concrete pavers. Apply, allow to dwell per manufacturer instruction, scrub, and rinse thoroughly. Do not use undiluted muriatic acid on Cambridge Pavingstones with ArmorTec — it strips the protective coating.
- Efflorescence (white mineral deposits): Use a diluted efflorescence cleaner specifically formulated for concrete pavers. Apply, scrub, and rinse thoroughly. Light efflorescence sometimes weathers off naturally with rain and sun over one to two months. Heavy deposits from multiple winters need chemical treatment.
- Leaf stains and tannin deposits: Diluted white vinegar (one part vinegar to four parts water) applied and scrubbed removes most tannin-based staining without affecting ArmorTec. Rinse thoroughly after treatment.
- Paint or sealant spills: Address immediately before drying. For dried paint, consult the paver manufacturer’s recommendations for your specific product — some paints require solvent treatment that must be confirmed as compatible with the paver coating before application.
| Stain Type | Recommended Treatment | Safe on ArmorTec? | Timing |
|---|---|---|---|
| Grease / BBQ oil | Degreaser + scrub + rinse | Yes | Address within 48 hours |
| Rust | Oxalic acid paver cleaner | Yes (diluted) | As soon as identified |
| Efflorescence | Paver-specific efflorescence cleaner | Yes | After spring cleaning |
| Leaf/tannin | Diluted white vinegar + scrub | Yes | End of fall season |
| Biological growth | Paver-safe bio cleaner | Yes | Spring deep clean |
| Paint | Manufacturer-specific (verify compatibility) | Verify first | Immediately while wet |
Need help with a stubborn paver stain or surface issue? Contact Affordable Patio — our team advises on paver-specific care for Cambridge Pavingstones and other materials across Nassau County.
Paver Sealing in Your How to Clean and Maintain Your Paver Patio Routine
How to clean and maintain your paver patio includes knowing when and how to seal. Paver sealing is the maintenance task most homeowners either skip entirely or do too frequently, and both approaches reduce the value of the sealer investment. The right sealing schedule is every two to three years, applied only when the existing sealer has worn off — not annually as a precaution.
The test for whether sealing is needed: pour a small amount of water on the paver surface. If it beads and rolls off within 30 seconds, the sealer is still active. If it absorbs into the surface, the sealer has worn off and reapplication is appropriate. Sealing over existing active sealer builds up in layers that can cloud, peel, and trap moisture — creating more problems than the sealing was meant to prevent.
Paver sealing application requires a fully clean and dry surface — at least 24 to 48 hours after the surface has been thoroughly cleaned and joint sand has cured. Apply with a low-pressure pump sprayer in overlapping passes. Keep coverage consistent and avoid pooling in low areas or joints. According to the National Association of Home Builders, properly maintained and sealed paver installations significantly outperform unsealed surfaces in color retention, stain resistance, and overall lifespan — particularly relevant in Long Island’s high-humidity summer climate where biological growth is a recurring maintenance consideration.
Planning a paver project or needing guidance on maintaining an existing installation? Use our Build & Price tool to explore new patio options, or contact our Nassau County team for maintenance advice on your current surface.
Joint Sand: The Core of How to Clean and Maintain Your Paver Patio
How to clean and maintain your paver patio effectively depends more on joint sand management than any other single task. Joint sand is the structural glue that holds paver position, prevents edge rocking, limits water infiltration to the base, and blocks weed germination between paver units. When joint sand degrades — from freeze-thaw stress, water erosion, or chemical exposure — the entire paver system becomes more vulnerable to shifting, weed establishment, and base damage.
Paver patio maintenance for joints requires inspection each spring and after any heavy rain event that may have washed sand from the joints. Signs of joint degradation include: visible gaps between pavers, sand that is dusty and loose rather than firm and bound, weed growth in joints, and ant activity below the surface (ants create tunnels through degraded polymeric sand). Refill degraded joints with fresh polymeric sand following the process detailed in our spring maintenance guide — sweep in, tamp, blow off excess, mist to activate polymer binding. For a reference on why joint integrity matters to overall paver performance, our comparison of pavers vs. concrete patios covers how joint management affects long-term durability relative to poured surfaces.
How to Clean and Maintain Your Paver Patio: Annual Inspection
How to clean and maintain your paver patio comprehensively includes an annual structural inspection that goes beyond surface cleaning and joint management. The structural inspection assesses the underlying base condition, drainage performance, and edge restraint integrity that keep the surface level and stable over time.
- Level check: Walk the patio looking for any units that have settled below adjacent pavers or heaved above them. A 6-foot level placed across the surface identifies any sections that have moved beyond acceptable tolerance (typically more than 1/4 inch over 6 feet).
- Drainage check: Run a garden hose on the surface and observe water flow. Water should move toward drainage channels or lawn edges without pooling anywhere on the patio surface. Persistent puddles indicate either settling that has created a low spot or a drainage channel that has become partially blocked.
- Edge restraint check: Inspect the plastic or concrete edge restraints at all patio borders. Edge restraint that has shifted, cracked, or pulled away from the paver edge allows border pavers to migrate outward over time, eventually creating gaps and instability along the patio perimeter.
- Base condition around penetrations: Check the area around any utility access points, tree roots near the patio edge, and downspout discharge areas. These are the locations where base layer movement most commonly originates.
For a visual reference on what properly installed base and drainage looks like, see our patio installation step-by-step process which covers base preparation and drainage specifications we use on every Nassau County project.
Frequently Asked Questions
How often should I follow a how to clean and maintain your paver patio routine?
How to clean and maintain your paver patio on a routine basis means sweeping monthly during the outdoor season (May through October) and rinsing after use in areas with cooking or dining. A thorough deep clean is appropriate each spring after winter and optionally in fall before winter. Spot stain treatment should happen within 48 to 72 hours of occurrence for oil and food stains. Annual inspection of joint sand, edge restraints, and drainage adds one more structured maintenance touchpoint to the full paver patio maintenance calendar.
What cleaners work best in a how to clean and maintain your paver patio plan?
For routine paver patio maintenance, plain water with a stiff brush is adequate for most surface cleaning. For biological growth (algae, moss), a diluted paver-specific biological cleaner is the safest effective option. For stain treatment, match the cleaner to the stain type — degreaser for oil, oxalic acid cleaner for rust, efflorescence cleaner for mineral deposits. Avoid bleach, muriatic acid, and strong solvents on Cambridge Pavingstones with ArmorTec as they can damage the protective coating. Always rinse thoroughly after any chemical treatment.
How do I keep weeds from growing between my pavers?
Weeds between pavers establish themselves in degraded or depleted joint sand. The primary prevention for paver patio maintenance is keeping joints filled with fresh polymeric sand, which hardens when water-activated and prevents weed seed germination. Inspect joints each spring and refill any degraded areas before weed seeds have an opportunity to establish. For existing weeds, remove them manually by root and then refill the joint with fresh polymeric sand. Avoid using bleach or herbicides in paver joints as they can damage both the paver surface and surrounding lawn areas.
Can I pressure wash my paver patio without damaging it?
Yes, with proper settings. Use 1,500 to 2,000 PSI maximum pressure, a 25 to 40-degree fan tip nozzle, and maintain 12 inches of minimum distance from the paver surface. Keep the nozzle moving continuously — never hold it stationary on one spot. Direct the flow across the surface rather than into joints at high pressure, as concentrated water pressure erodes polymeric joint sand. After pressure washing, inspect joints and replace any sand that has been dislodged. Allow 24 to 48 hours of drying time before applying new joint sand or sealer.
How do I know if my paver patio needs professional maintenance vs. DIY care?
DIY paver patio maintenance covers routine cleaning, joint sand refilling, and sealer application — tasks most homeowners can complete with basic equipment and two to four hours per task. Professional help is appropriate for: resetting pavers that have heaved or settled significantly, repairing base layer damage that requires excavation and recompaction, addressing large-scale joint failure across the full patio, and sealing large or complex surfaces where even application is important. If your annual inspection reveals settling exceeding 1/4 inch in multiple locations or persistent drainage issues, contact a Nassau County paver contractor for a professional assessment.
Keep Your Paver Patio Looking Great for Decades
How to clean and maintain your paver patio comes down to one consistent routine applied year after year. How to clean and maintain your paver patio is not complicated — monthly cleaning during the season, spring deep cleaning and joint sand inspection, sealing every two to three years, and an annual structural walkthrough. None of these tasks require professional help in most cases, but together they extend the life and appearance of a Nassau County paver patio significantly beyond what an unmaintained surface would deliver. Affordable Patio has built and supported over 2,000 paver installations across Nassau County communities, and our commitment does not end at project completion — we are the resource for maintenance questions, material advice, and future expansion when your outdoor space is ready to grow. Contact us today for a maintenance consultation or a free estimate on a new Nassau County patio project.