Enjoy the comfort of your backyard
STEP BY STEP PROCESS
FROM START TO FINISH
We put this program together to help you understand the entire process from start to finish. Here at affordablepatio.com we want to educate and make sure you understand everything with your upcoming project. It is in your best interest to read through this entire page and browse our videos before we come for our in-person estimate, it will help you truly get a grasp on the future work we do together! Most of all, ensuring this is the easiest project you have ever completed at your home. Read everything carefully as we have made sure to include all the information and FAQ’s you may have.
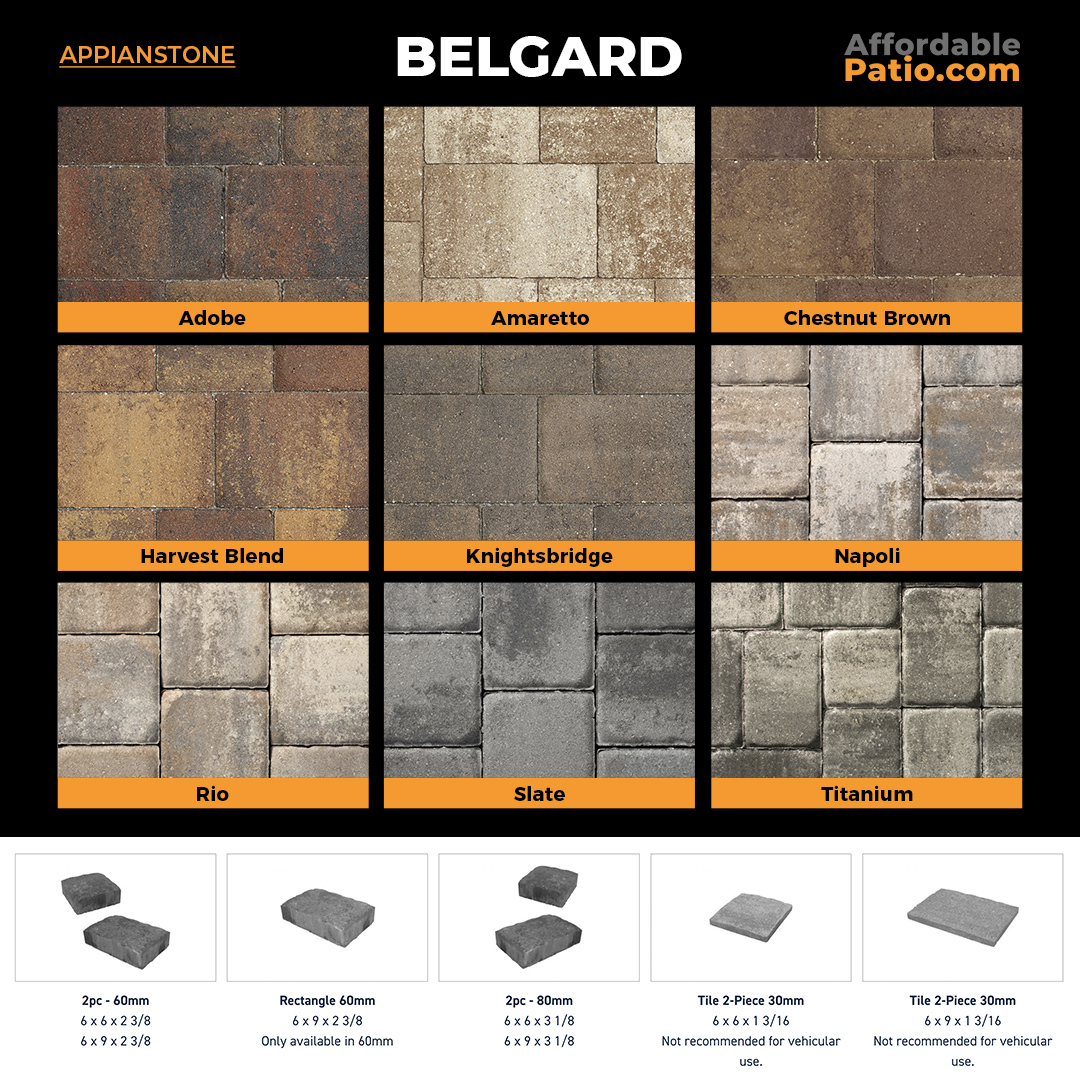
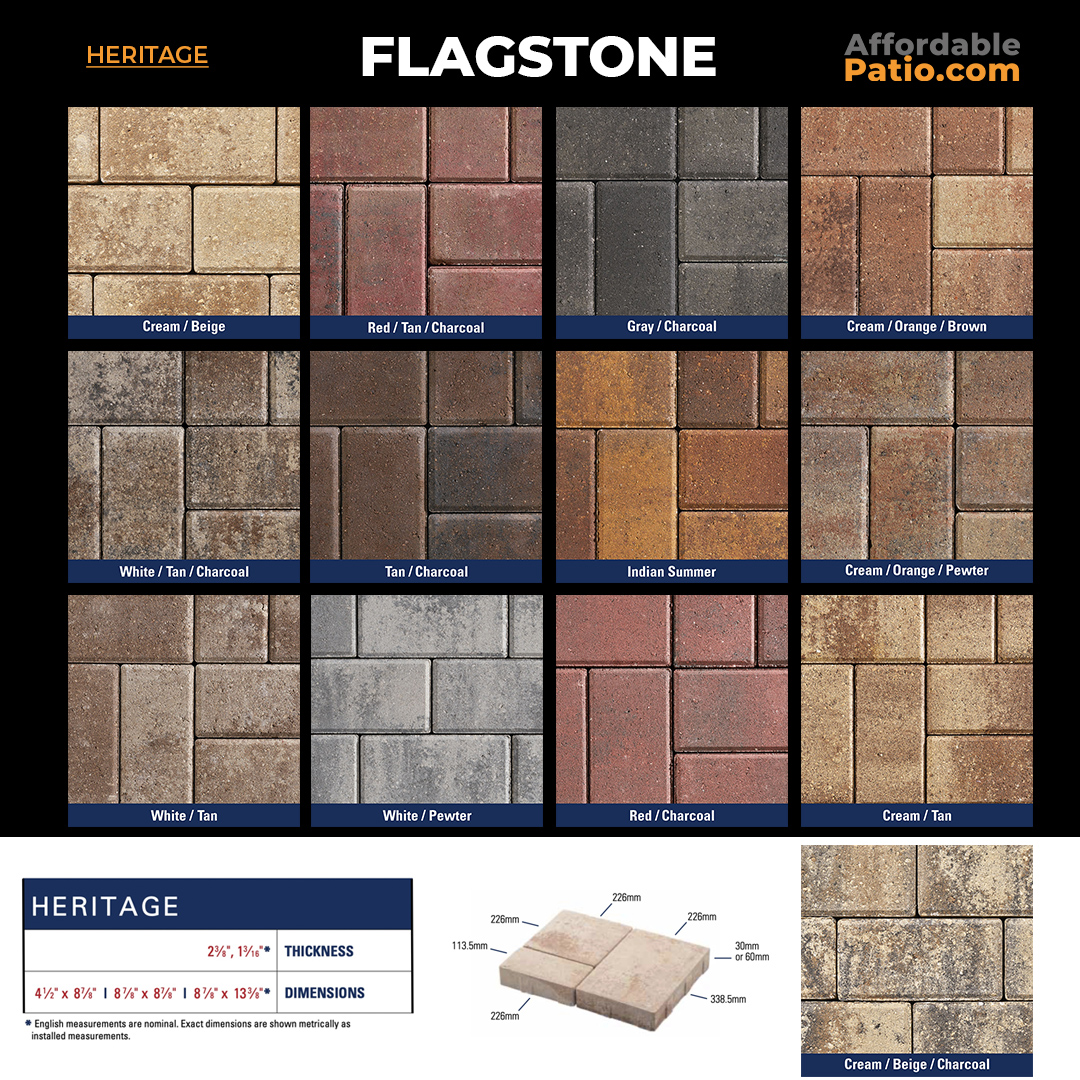
One of our knowledgeable team members will come to your house and start to go over ideas and layouts with you. We will take measurements and provide you with our AP Brochure and paver catalog, ensuring that you have all the information you need for your patio installation project. It is important that you take this time to ask the estimator any important questions or topics you were unsure of while reviewing our customer playbook. When the consultation is complete, we will go back to our office and start to work on your estimate for patio installation and patio installation cost estimate.
One thing we pride ourselves on is getting you an estimate in 24 hours or less. We do this because we know people, including ourselves, do not like waiting days or sometimes weeks for an estimate. We break down each part of the project to give you an “a la carte” feel and not pressure you into doing everything all at once. This will allow you to understand the project and allow you to budget and or save up for a future date.
After you fully review the estimate for patio installation and understand everything that was quoted, and you are ready to move forward with the project, you can call or email us to give the okay. At this point, we are so excited to work together. This is when the fun starts!
At this point you will be placed on our job board. This means your installation date is pending. At this time we will let you know approximately how far out we are on the schedule. We do this because we can not give out actual dates. We face a lot of obstacles in the day to day operations. For example bad weather is a key component in how our schedule is affected.
Now that we are about a week or two before your project starts we will contact you with an estimated start date and collect all information about your selections. If you have any questions after this please don’t hesitate to ask!
After we collect all your material selections we will place the order with the local supplier. They will deliver the order directly to your home. Depending on the size of the order, it may not all arrive at once. Also, at times we will pick up materials. The most important part about this step is letting us know where you would like the pallets of pavers to be placed. The most common areas are on top of the driveway or in the street on the curb.
Now that we are getting closer to the start date, we will contact you 1-2 days prior to starting your project. At this point we will send you over the contract through email via DocuSign. Please make sure you review and understand all of the notations that you are initialing and signing. After everything is signed it will automatically send us the signed copy.
The day we start your project the team will show up and go over the details with you. If you cannot be present and there is any uncertainty, we will be sure to be in constant communication with you. This will ensure we are all on the same page. The only thing we will need access to is water and electricity (hose spigot and outlets).
Now that all the equipment and machines are onsite and the guys are ready to start the job, a deposit will be collected. One of our managers will collect the deposit from you, in the amount stated on the contract. They can sign off for you that it was collected. We accept all forms of payment including cash, credit card, and check. Fees may apply if necessary.
Our typical day starts at 8 AM and ends around 4 PM. There are times we will arrive earlier depending on the distance from our office and times we will leave your house later depending on the job process. The crew will take lunch mid day. At the end of the day the crew will clean up and organize the property before heading out. Each crew we have only does one project at a time so rest assured, once we start your project we will be there until we finish it
Throughout the job, one of our managers will be checking in with the crew to make sure all is going well. Each crew is appointed a crew leader to run the rest of the team (foreman). Any communication you have is best to go through management or the office so we can guarantee your questions or concerns get communicated to the right people.
It is super important during your estimate for the patio installation project that if you have any questions, please ask. The best time to ask is during the installation process, as it’s the easiest way to make adjustments if needed. When the job is complete and your property is cleaned up, we like to do a final walkthrough of the project and ensure everything is up to your expectations. We are here to help you and make sure your experience is great. If you are happy with the project, this is where we collect the final payment.
When everything is complete and you are completely satisfied, we ask that you leave us a 5 star google review. This helps more than you think! If your experience with us was great and we provided you with great service and an awesome end product, we hope that you can share it with others.
Services
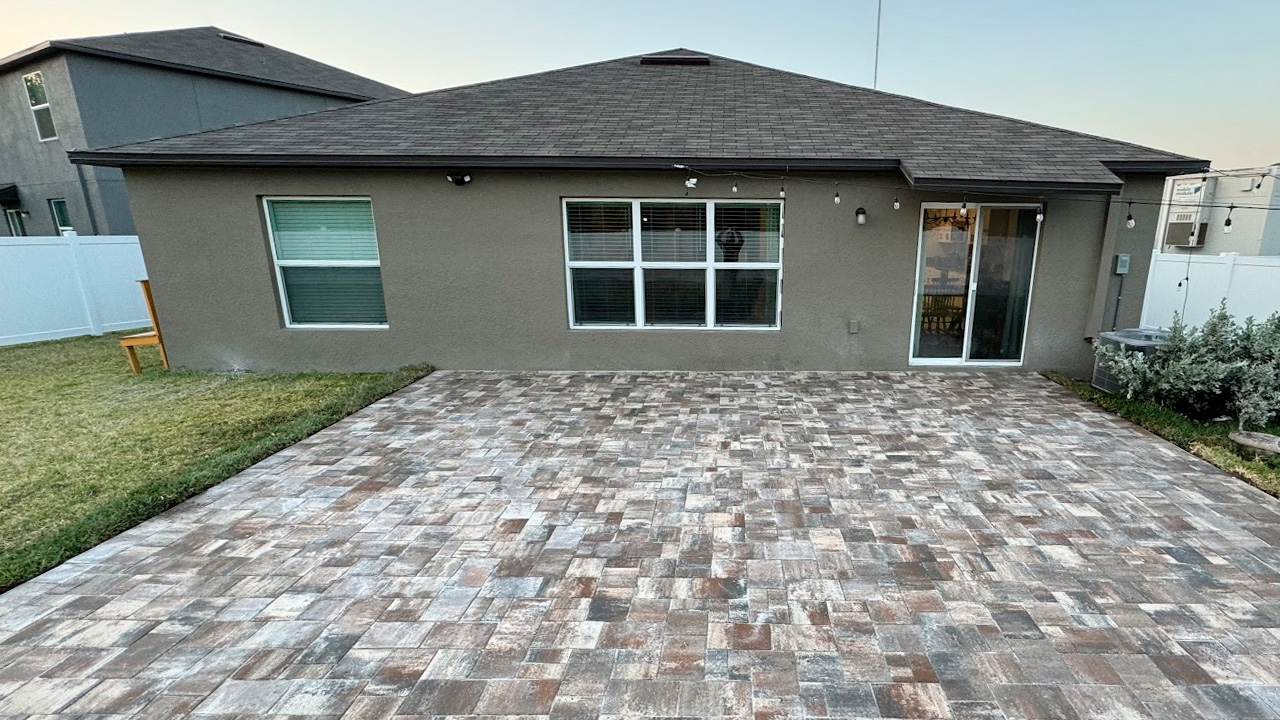
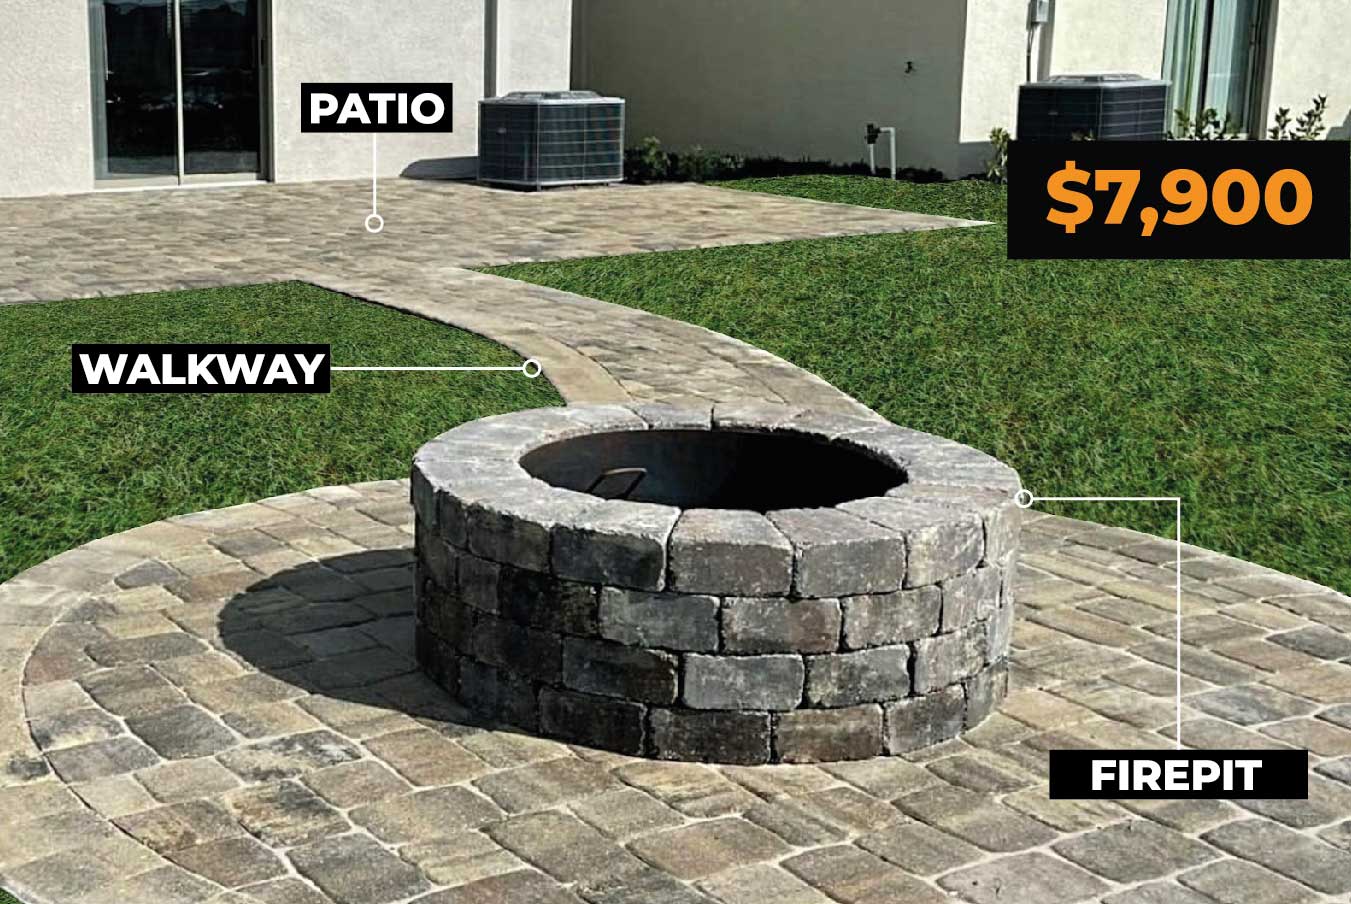
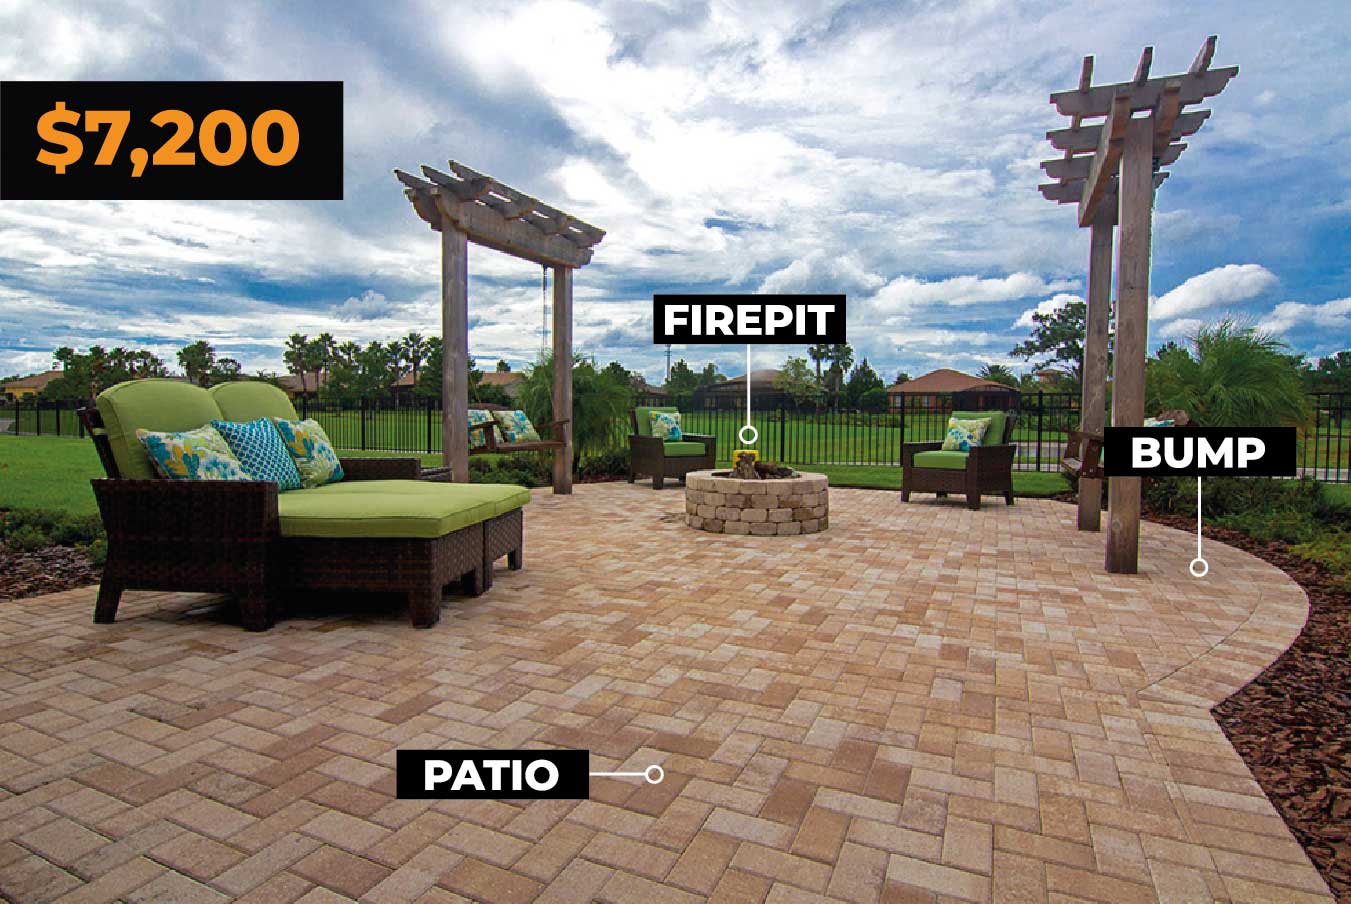
Patio
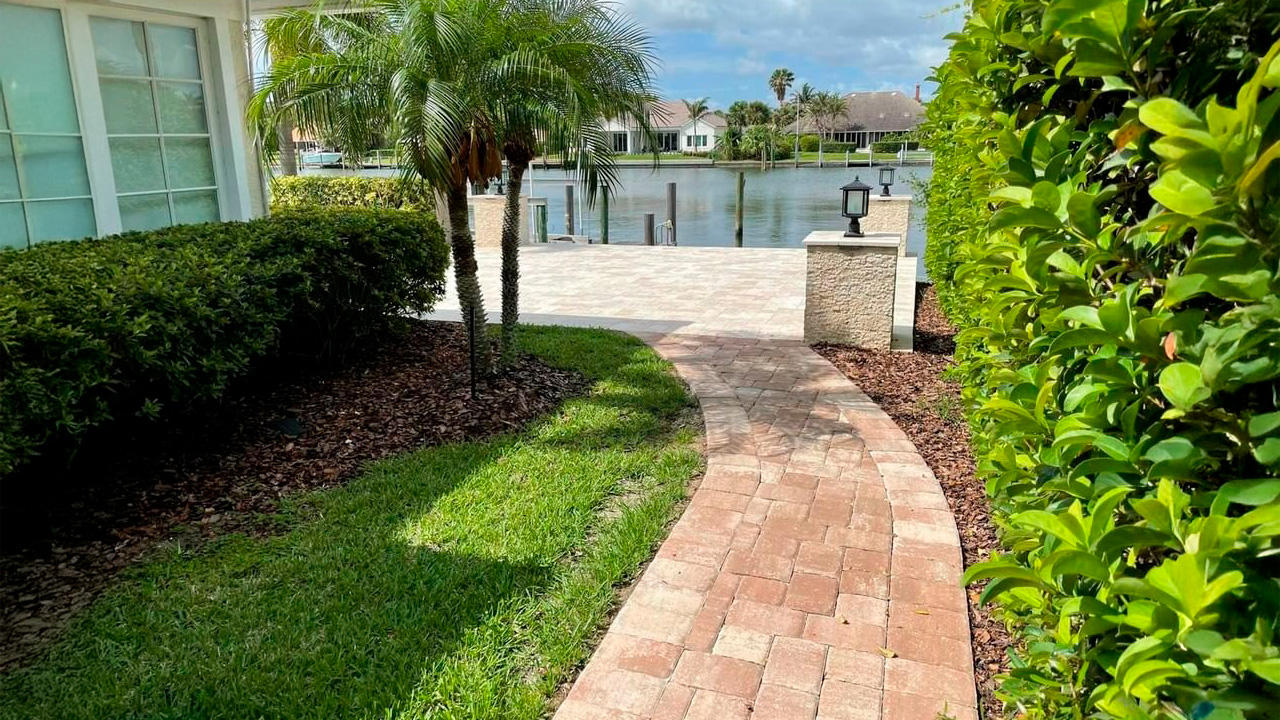
Walkway
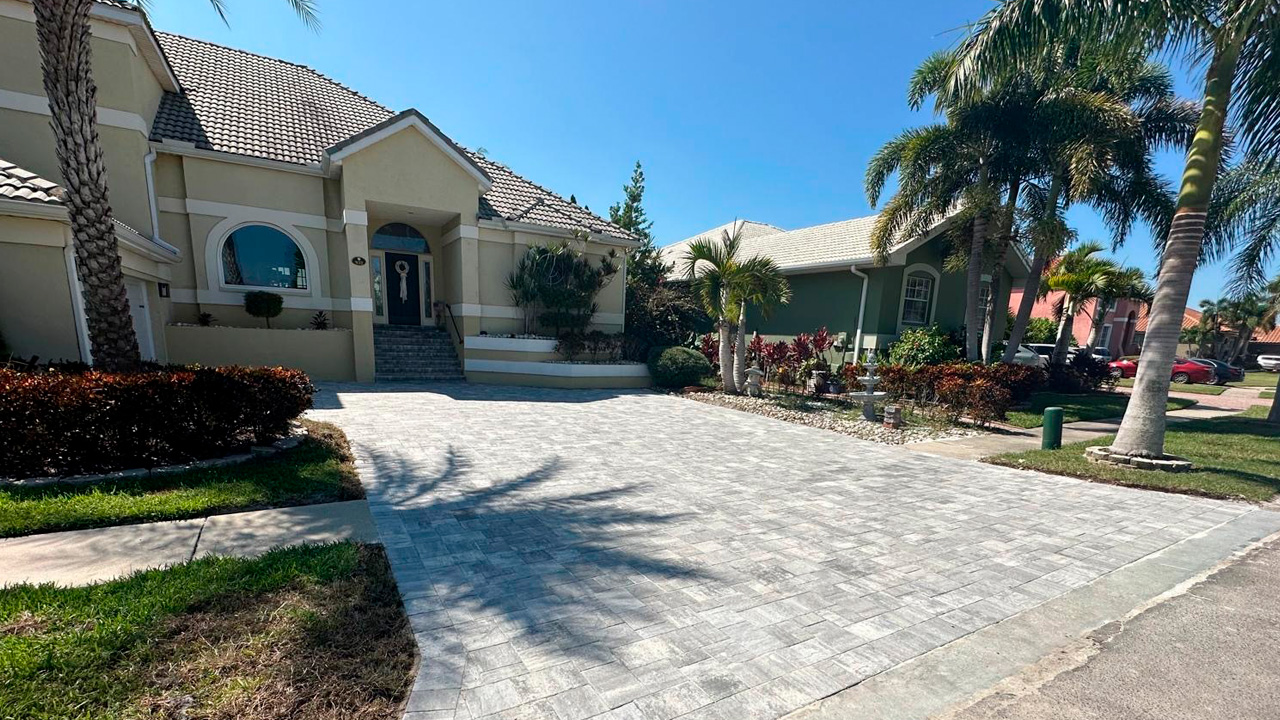
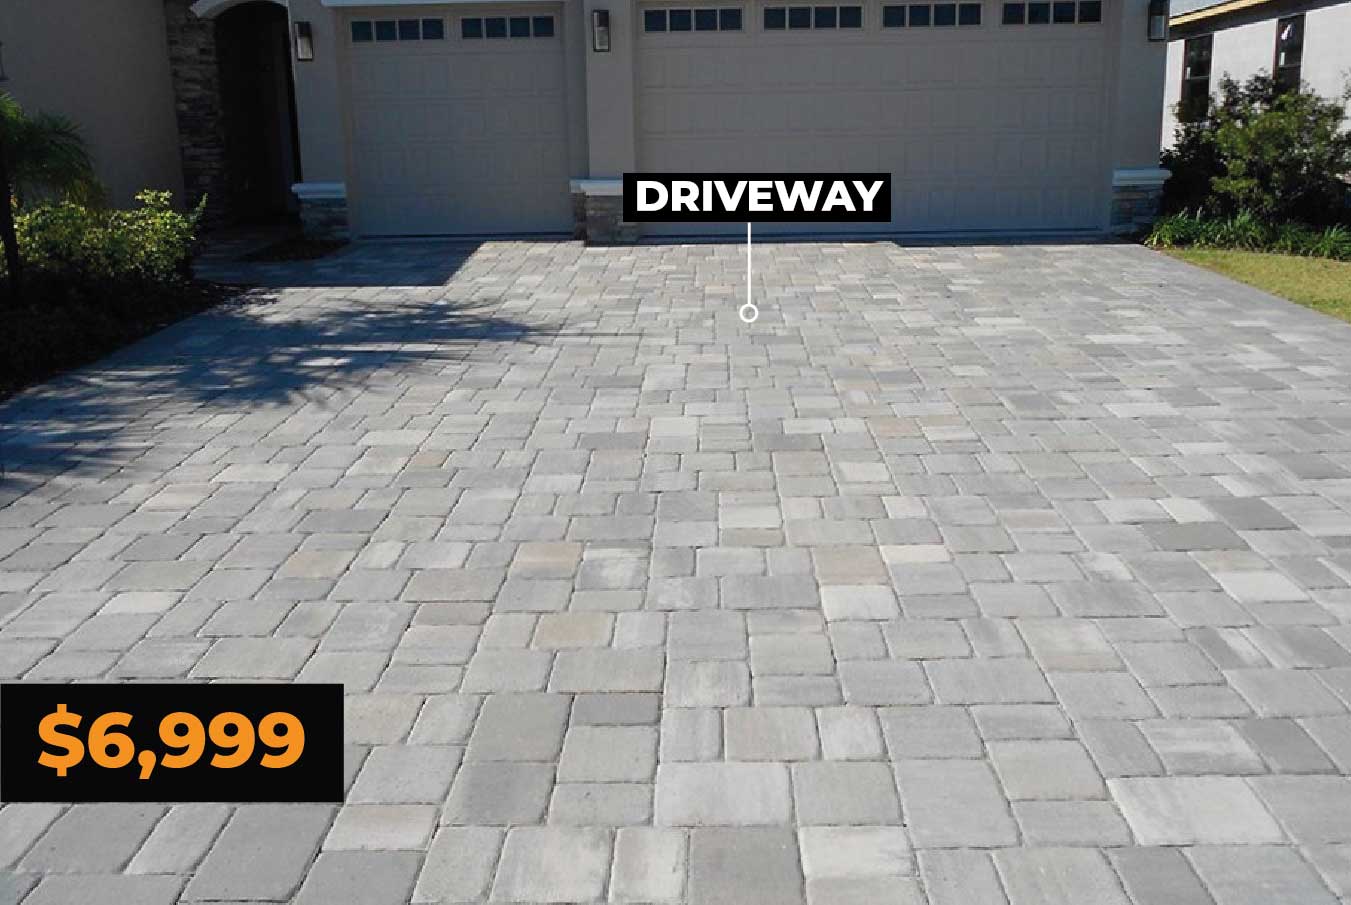
Driveway
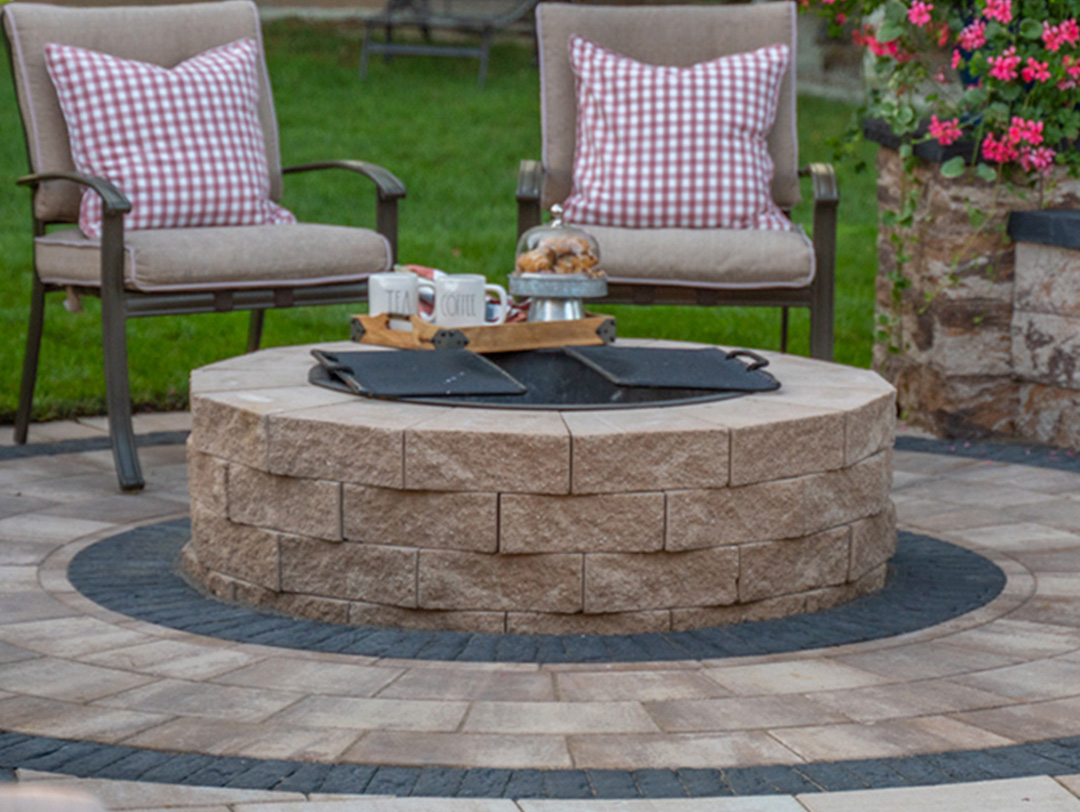
Fire Pit
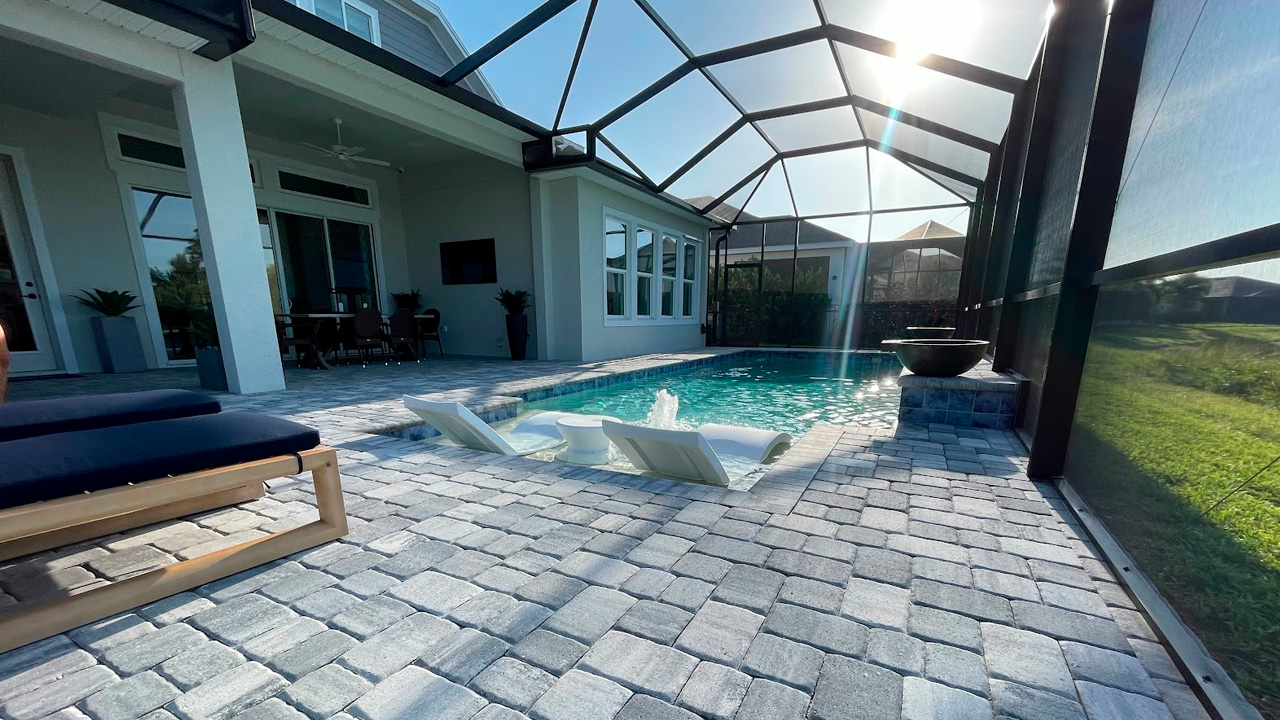
Pool Patio
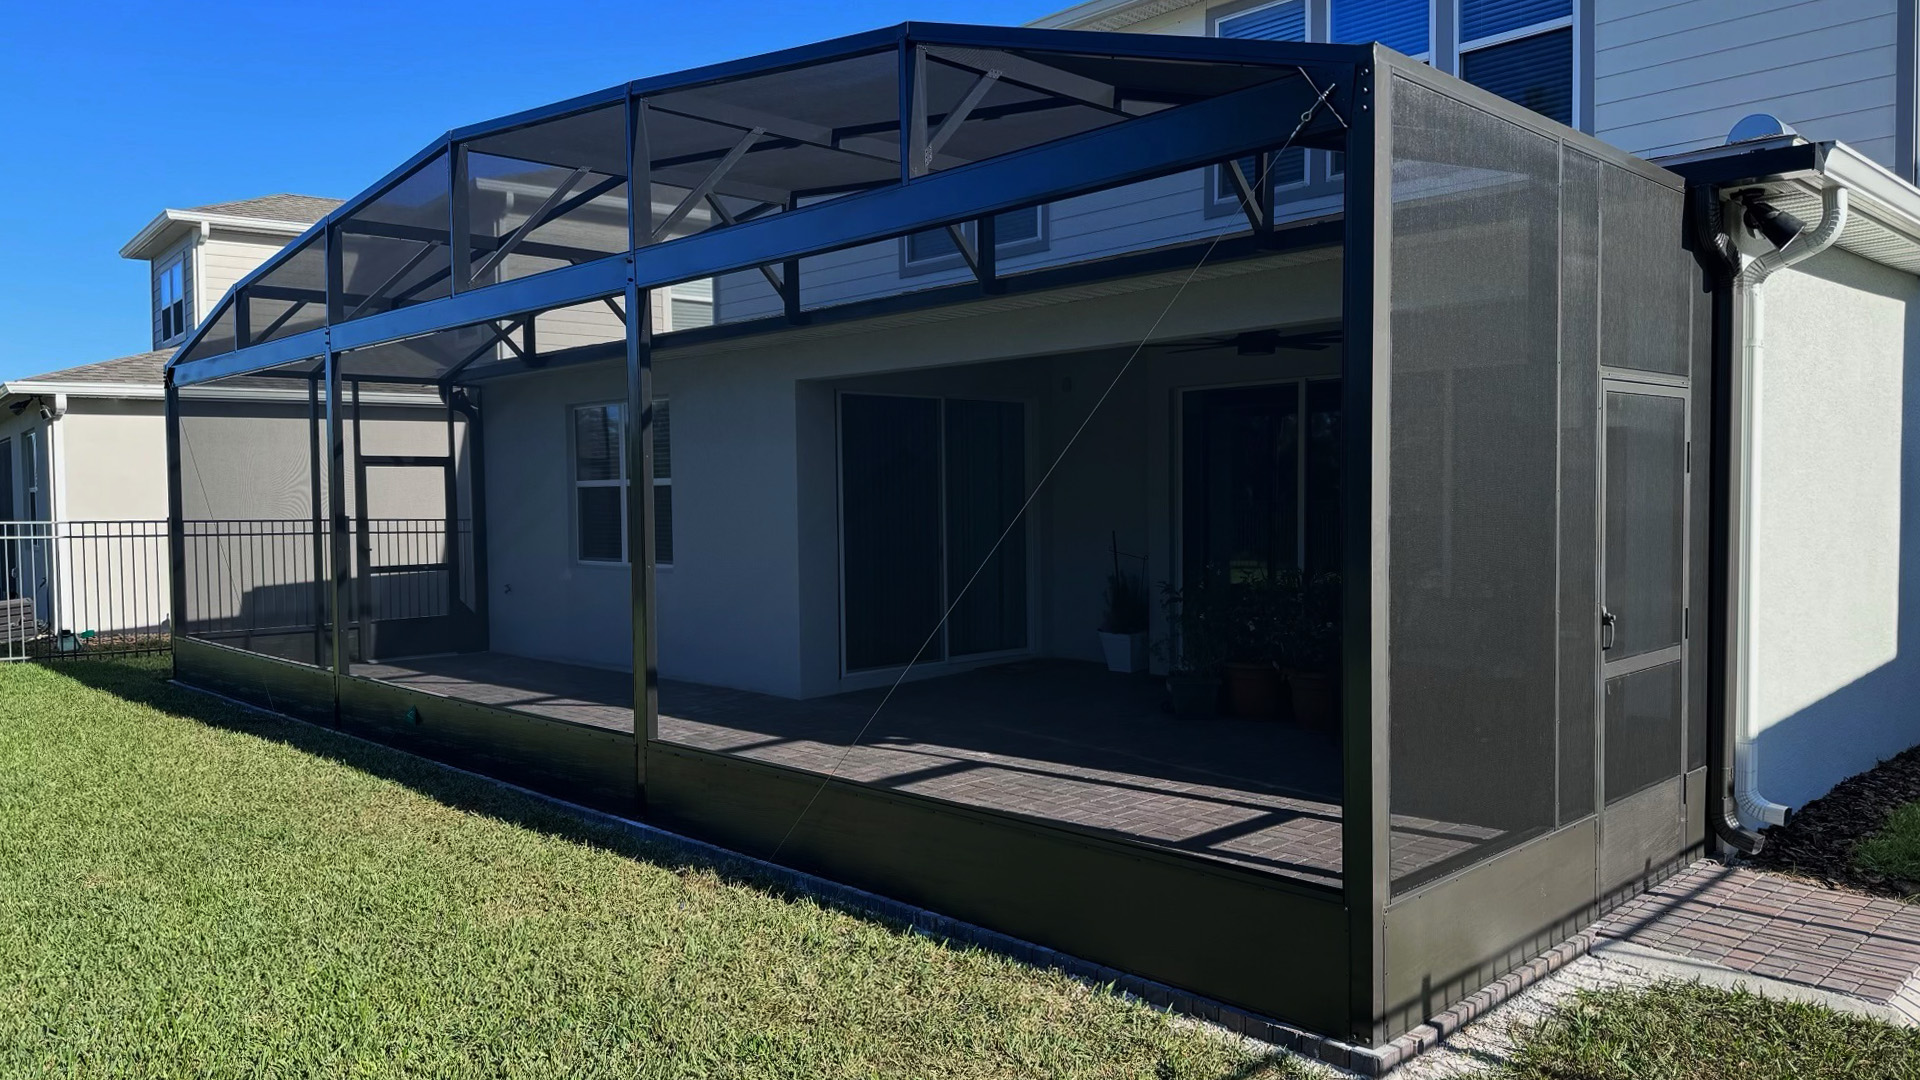
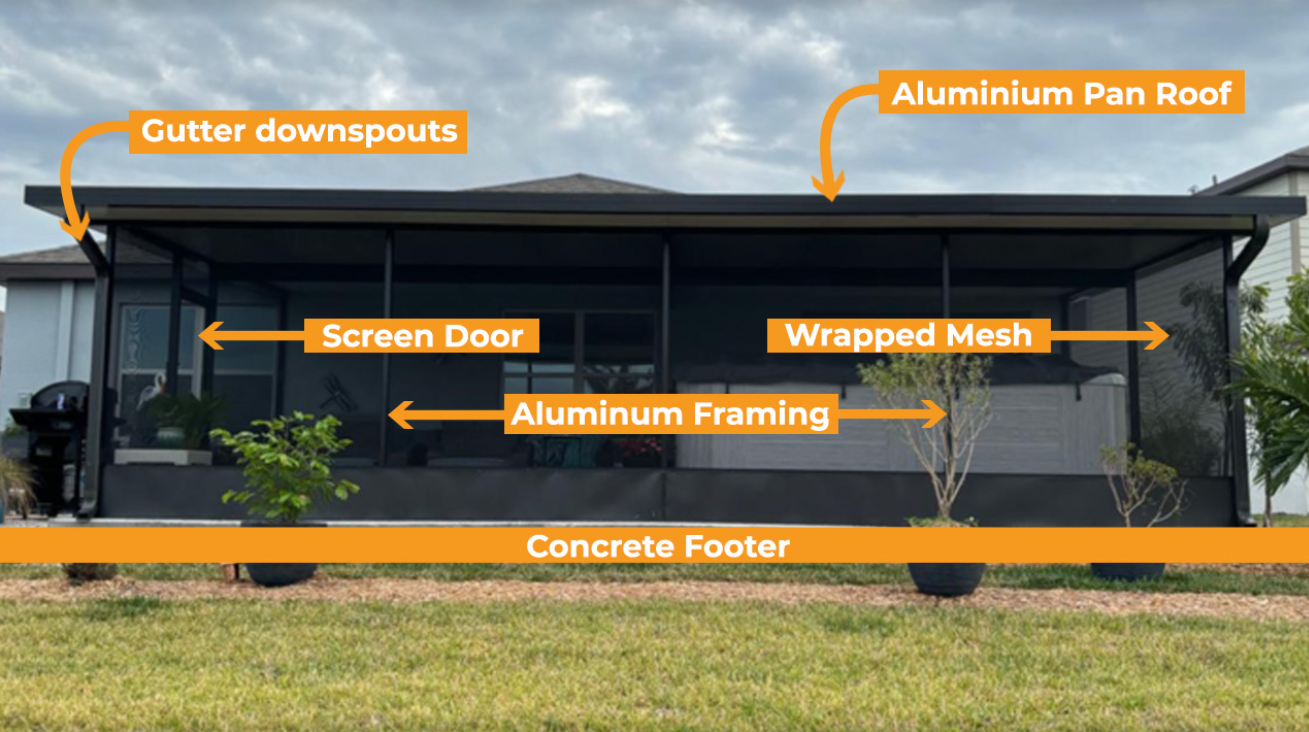
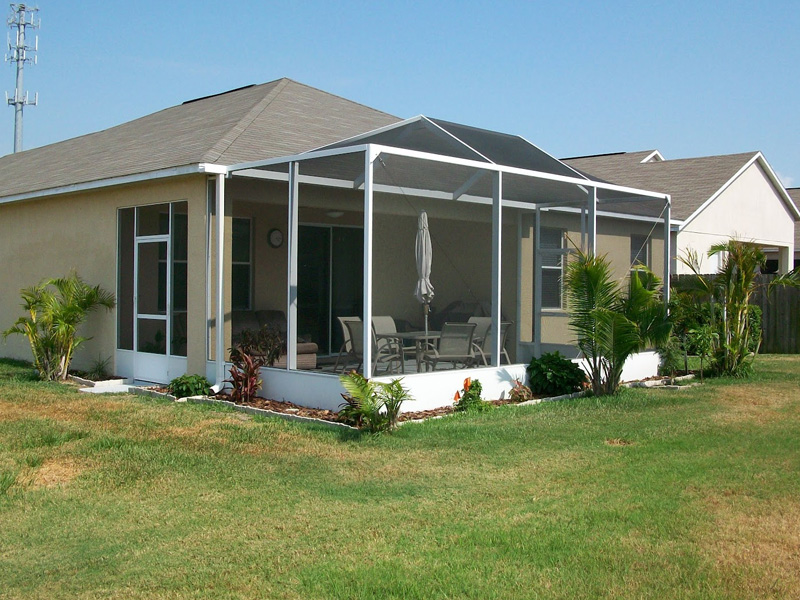
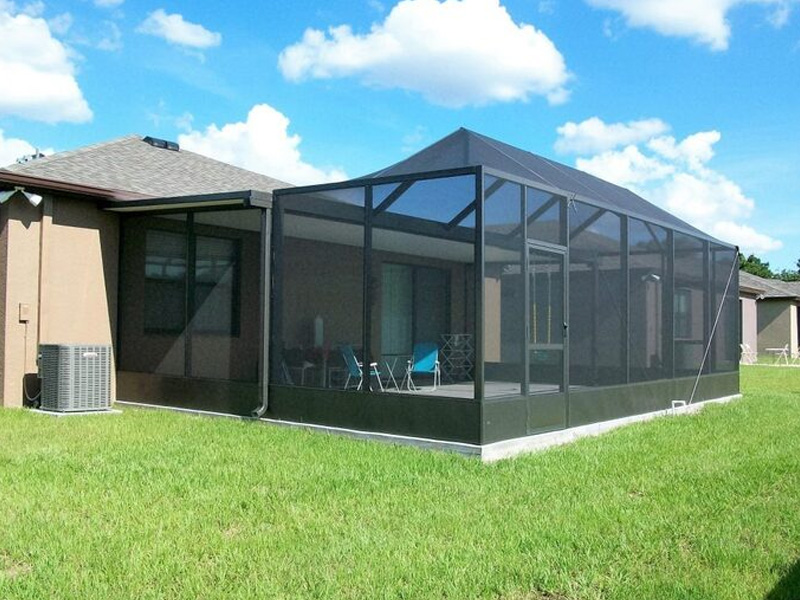
Lanai Screen Enclosure
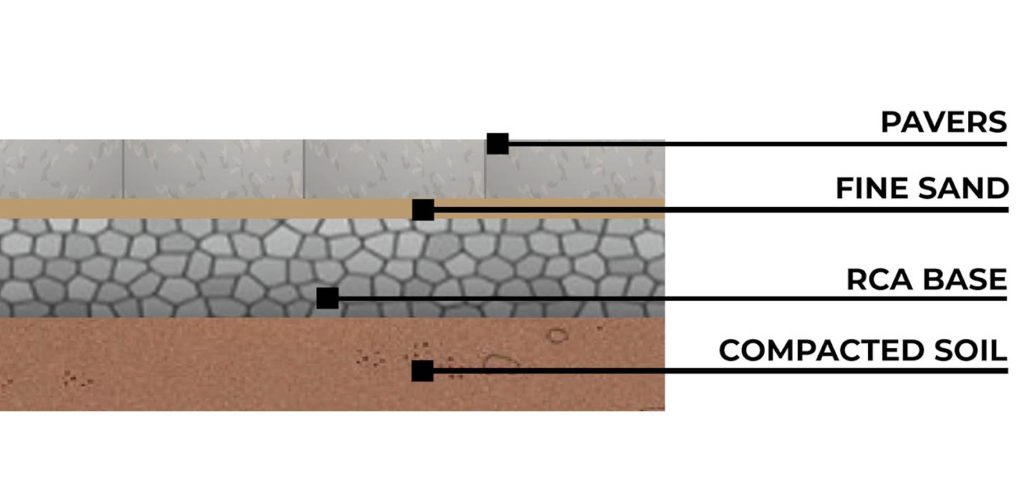
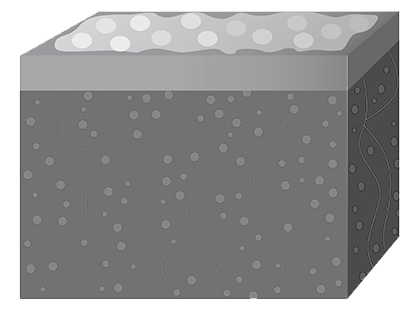
What's Underneath Our Patios?

Patios & Walkways
Driveways
PITCH

PITCH
No one wants to risk having water enter their home. This is especially true for homeowners having finished basements. During heavy rain events, water could collect on the patio or sidewalks.
All Patios, Walkways & Stoops are ALWAYS pitched away from the house for water run off. Pitch is 1.5” over 10 feet. (NYS code)
WILL IT GO AWAY NATURALLY?
WHEN WILL EFFLORESCENCE STOP?
CAN IT BE REMOVED WITHOUT THE WAIT??
THE CHEMISTRY OF EFFLORESCENCE
Efflorescence Cleaner
Eliminating Efflorescence
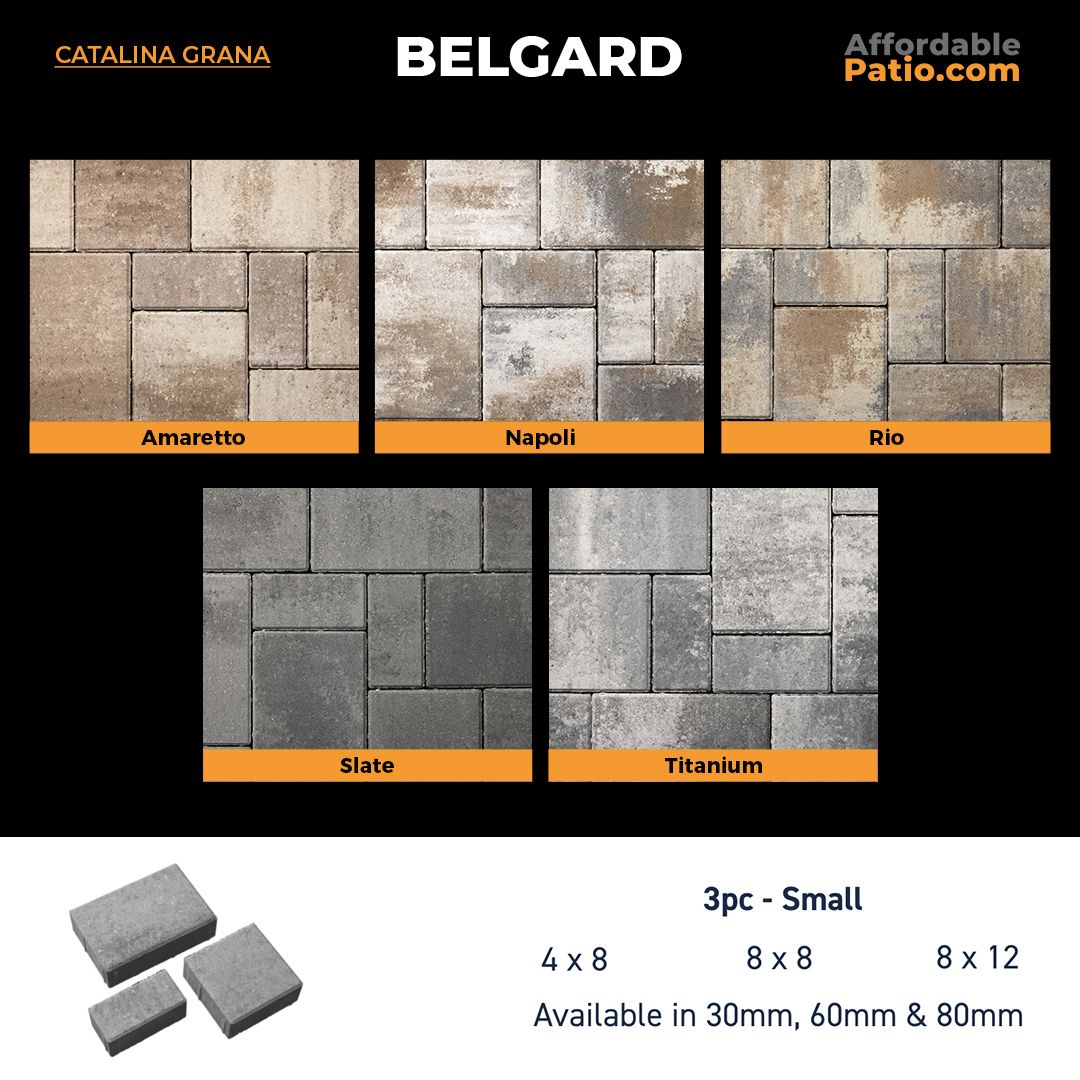
Pavers Included
A Look at Affordable Lanai's Screen Installation
Framework Color Options
Available Colors
Coping

Cambridge Crusader 12×24 Cap

6 x 12 Bullnose

Ledgestone Cap with Armortec
Patio Space & Usage
What is efflorescence?


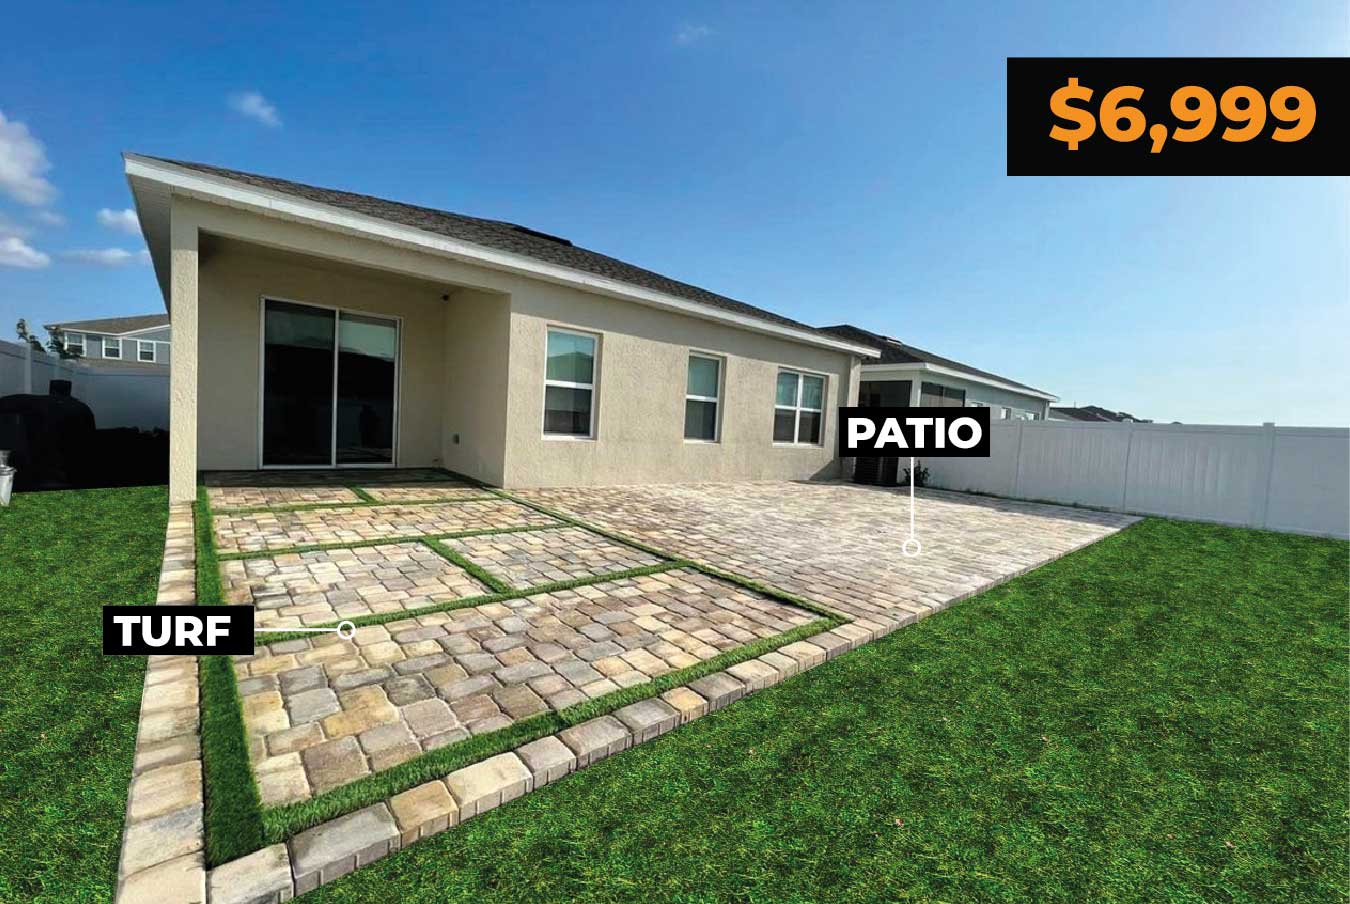
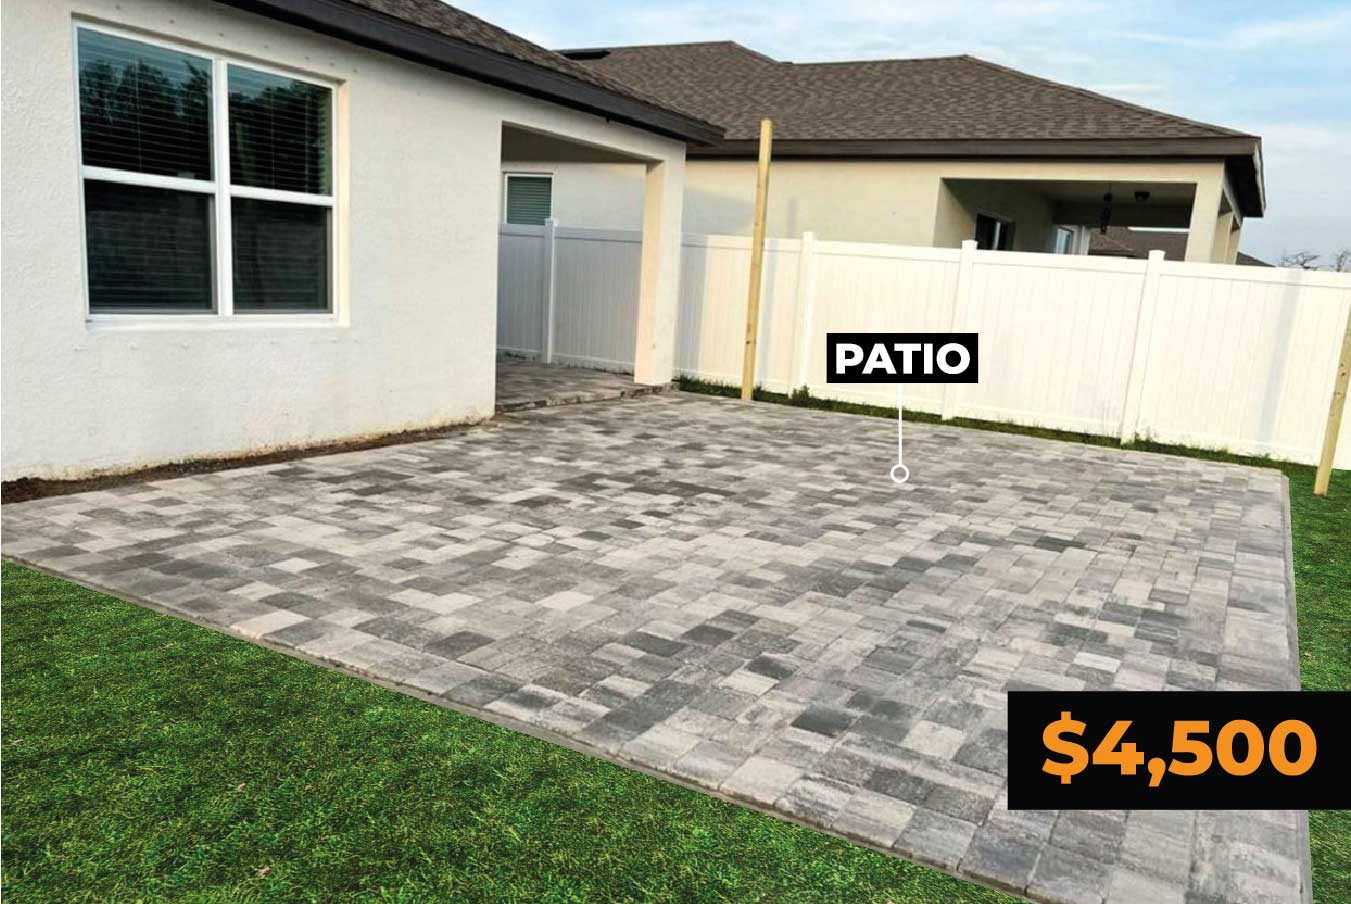
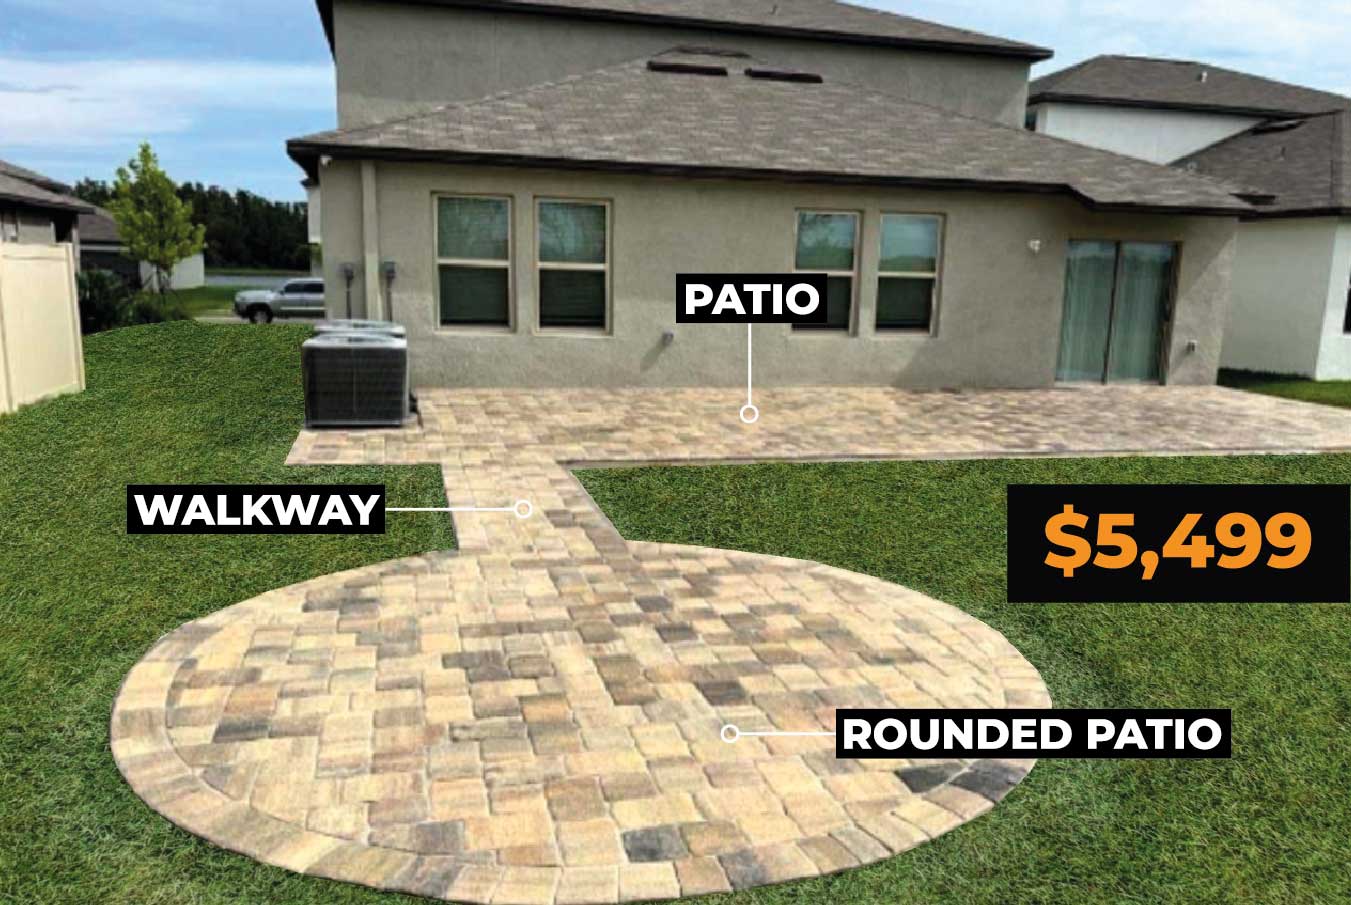
Examples of what similar projects could cost

Trustindex verifies that the original source of the review is Google. I have used Affordable Patio three times now for three different projects and I have always been happy with their service. Dealing with James and Kristina in the office is a pleasure. The entire project is thoroughly planned out and executed appropriately. I highly recommend this company. Thanks again AP for all your help!!!Trustindex verifies that the original source of the review is Google. You guys killed it. Thanks for rocking out the back patio. We’re super excited to make new memories. Thanks for the great work guysTrustindex verifies that the original source of the review is Google. We had a wonderful experience from start to finish. James, Kristina, and the entire crew were great to work with!! We will have them back for more projects for sure!!Trustindex verifies that the original source of the review is Google. Working with James Gio Kristina and evo plus his team was an awesome experience. As somone in the industry I was truly impressed and couldn’t believe the standard held by precision. Would recommend 10/10!! Super knowledgeable and worth every penny! felt better than family!!Trustindex verifies that the original source of the review is Google. I just had my patio done and from start to finish everything went amazing. From the moment they came for an estimate, to the moment they finished, everything went smoothly. All the workers were professional and worked so fast. There were no hidden costs, no surprises. Kristina in the office keeps you informed step by step from the point they send the estimate, selecting the brick, start of the project and even throughout the project. She even sent photos of different color combinations as I was indecisive at first. Can't wait to enjoy my backyard with family and friends this summer. Will definitely be using them for future projects to come. Home projects can be stressful and feel like a chore between companies not showing up for estimates, hidden costs, poor workmanship, etc. That was not the case with James, Kristina and the rest of the crew. They made it feel like a breeze!Trustindex verifies that the original source of the review is Google. Affordable Patio is an amazing company! From the estimate, to the install and the clean up. We went online and more or less got a price on our own. We then scheduled an appointment with James, Kristina answered the phone and all of our questions, she’s was polite, knowledgeable and courteous! James came to give us an estimate and was able to figure out a way for us to get a fire pit! We always dreamed of a fire pit! When the install was getting done, the crew was courteous and walked us threw every step and cleaned up like we never had any work done! 5 ⭐️ I love them and recommend them to everyone!Trustindex verifies that the original source of the review is Google. From the initial email that I sent for a quote, to the meeting with James, to the final finished project, I have nothing but excellent things to say about this company. It was an absolute pleasure working with Kristina throughout this whole process. She was very attentive and very quick with responses and questions that I had. Joe and his crew did beautiful work on my patio. I highly recommend this company to anyone looking for a backyard transformation.Trustindex verifies that the original source of the review is Google. Recently had a patio done 18x 35 in size . The crew that came was one of the best that I have seen . They all worked as a team . The lead guy joe was great , explained every detail that was going to happen . They worked together and completed the job in a day and a half . The bob cat did rip up some grass but they brought in top soil and leveled. the lawn to repair the damage . Clean up was just as good . The garbage was placed in bags , removed the dirt from the driveway . Filled the track marks with top soil . Did a great job and would use them again . The entire process was painless .Trustindex verifies that the original source of the review is Google. James and Kristina were very helpful and got the job done very quickly. My patio came out great! I would highly recommend them.Trustindex verifies that the original source of the review is Google. James, Kristina and their work crew did an amazing job. They not only did our backyard they also did stone work on the front of our home and of course our front porch. The crew always cleaned up after their work day.. We couldn't be happier with how our home turned out!
FAQs - company
If you have sprinklers in the area we will make sure we relocate the sprinklers to the outside of the patio. We want to make sure that no sprinklers are under the base just in case a line breaks and it needs to be repaired. We are not a sprinkler company so you are responsible for having a company come in and adjust sprinklers or relocate after your project is completed. If your project has a lot of lines in the way we may just cut and label each one to the best of our ability to help the sprinkler company.
Most patio jobs are qualified as capital improvements. A capital improvement is any addition or alteration to real property that meets all of the following conditions: It substantially adds to the value of the real property, or appreciably prolongs the useful life of the real property.
If your project is a capital improvement there are no sales taxes so when you get the price of the project that is the final price.
Here at affordablepatio.com we accept multi types of payments. We accept cash, personal checks and credit cards. When using a credit card there will be a 3.75% charge to the total part of the job.
Contracts will be emailed 1 to 2 days before the project is started via docu-sign. We do not take any deposit until we are at your property. Payment breakdown will be 50% day we start and 50% on completion. If a job is longer than a week or a job is larger than 25,000 payment will be broken down 50% on start date, 40% ⅔ of the job and finally payment 10%.
FAQs
Maintenance
Alliance Rubber, Paint and Tar Remover or scrub black area with water, detergent and scouring powder. In the case of small stained areas, removal and replacement of marred pavers may be an easier option.