How to install a paver walkway starts long before the first paver is placed. A walkway that stays level, drains correctly, and looks clean for years depends on base preparation, height setting, excavation, compaction, edge restraints, and polymeric sand. Many DIY walkways look good at first but begin sinking or shifting because the foundation was rushed. This guide explains how to install a paver walkway the right way, what most homeowners miss, and why Affordable Patio’s Long Island installation process focuses heavily on grade, subbase, and drainage.
Quick Answer
How to install a paver walkway correctly means setting the grade, excavating 7 to 8 inches below finished height, compacting the native soil, adding compacted RCA subbase in lifts, screeding a thin mason sand layer, laying pavers square to the home, installing concrete edge restraints, and locking joints with polymeric sand.
Why the Base Matters Most
How to install a paver walkway correctly starts with the base. The pavers are the visible part, but the base is what controls long-term performance. If the ground below is not compacted, the walkway can settle. If the subbase is too thin, the pavers can dip. If the slope is wrong, water can collect or run toward the home.
Quality pavers are built to last, but they still need a stable foundation. A walkway that fails after a few seasons usually fails because the installer skipped compaction, used the wrong base material, or did not create the correct pitch.
Affordable Patio provides paver walkway installation in Suffolk County with proper excavation, RCA subbase, compaction, concrete edging, and polymeric sand.
Step 1: Grade Assessment and Height Setting
The first step in how to install a paver walkway is checking the grade of the property. Before digging starts, the installer needs to understand the height of the home, driveway, porch, steps, lawn, and any nearby hardscape. This determines where the walkway should begin, where it should end, and how water should drain.
A properly pitched walkway usually slopes away from the home. A common target is about 1 to 1.5 inches of pitch for every 10 feet. The goal is to move water off the walkway without making the surface feel like a ramp.
Skipping this step can create serious problems. A walkway that is too high can interfere with steps or thresholds. A walkway that is too flat can hold water. A walkway pitched the wrong way can push water toward the foundation.
Step 2: Excavation and Soil Compaction
After the heights are set, excavation begins. For many standard residential walkways, the area is dug about 7 to 8 inches below the finished paver height. The excavated soil should be removed from the site because loose soil is not a stable backfill material.
The exposed ground is then compacted with a gas-powered plate compactor. This step reduces air pockets in the native soil and helps limit future settling. Long Island soil can vary by property, so compaction is one of the most important steps in building a walkway that lasts.
Before any digging project, homeowners should also be aware of underground utilities. New York 811 explains that property owners should call 811 before digging to locate underground lines. New York 811 homeowner guidance is a helpful safety resource for any project that involves excavation.
Step 3: Installing the Subbase
How to install a paver walkway with lasting strength depends heavily on the subbase. Affordable Patio commonly uses RCA, or recycled concrete aggregate, because it compacts tightly and provides a strong foundation for residential paver walkways.
The subbase should be installed in lifts, not dumped in all at once. A 2 to 3 inch layer is added, compacted, and then the next layer is installed and compacted again. This process continues until the proper subbase height is reached.
| Layer | Purpose | Common Mistake |
|---|---|---|
| Native soil | Provides the first support layer | Not compacting before adding base |
| RCA subbase | Creates a stable load-bearing foundation | Adding too much at once |
| Mason sand | Levels minor paver variations | Using too much sand |
| Concrete edge | Stops lateral movement | Leaving edges unsupported |
Step 4: The Sand Layer
The sand layer is where many DIY projects go wrong. The sand is not meant to replace the subbase. It is only a thin bedding layer used to fine-tune the surface before the pavers are laid.
A thin layer of fine mason sand is spread, tamped, and screeded smooth. This helps the pavers sit at a consistent height, even when the pavers have small manufacturing tolerances. Too much sand can create movement under the pavers and lead to uneven areas later.
Cambridge Pavingstones explains that its pavingstones with ArmorTec are used for patios, pool decks, walkways, and driveways. Cambridge Pavingstones product information is a useful resource for homeowners comparing paver materials.
Step 5: Laying Pavers and Borders
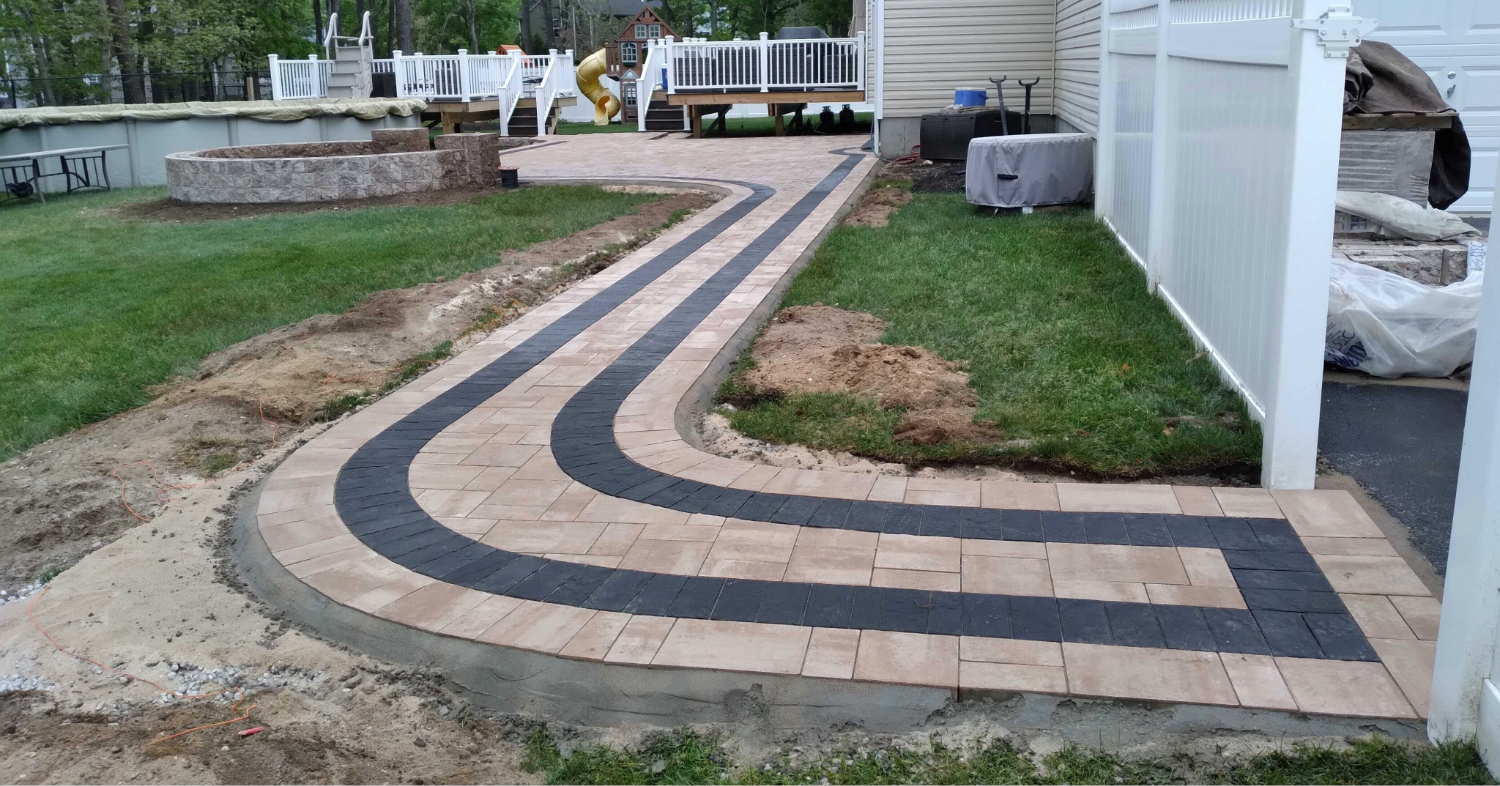
Once the base and sand are ready, square lines are set to keep the walkway aligned with the home, driveway, porch, or another fixed structure. This matters because the joints between pavers create visible lines. If the layout is not square, the finished walkway can look crooked even if the surface is level.
The field pavers are usually laid first, then borders are installed after. This allows cleaner cuts and a more finished edge. Border choices can be simple, matching, accent-colored, or double-bordered depending on the design.
Homeowners who want a stronger finished look can choose larger pavers, border color contrast, or custom layouts. Those design choices should be planned before installation begins so the pattern works with the final walkway size.
Step 6: Concrete Edges and Polymeric Sand
The final structural step in how to install a paver walkway is securing the edges. Concrete edge restraints are installed along exposed sides to keep the pavers from spreading outward over time. The concrete is usually set below the top surface of the pavers so it can be hidden with soil or landscaping.
After the edges are set, polymeric sand is swept into the joints. Once activated with water, the sand hardens to help lock the pavers together and reduce weed growth. Regular sand does not provide the same joint stability.
This finishing step is what helps the walkway stay tight, clean, and durable through weather, foot traffic, and seasonal ground movement.
What to Look for in a Professional Installer
Knowing how to install a paver walkway is useful, but most homeowners get better results by hiring an experienced installer. The right contractor should explain excavation depth, base material, compaction, pitch, edge restraint, paver options, and warranty coverage.
Affordable Patio has installed thousands of paver walkways across Suffolk County and is a Preferred and Certified Cambridge Paving Stone Installer. The company focuses on transparent pricing, manufacturer-spec installation, 12 to 24 hour estimate turnaround after property evaluation, and a 3-year warranty.
To start planning, visit the Affordable Patio contact page and request a free estimate.
Frequently Asked Questions
How deep should a paver walkway base be?
A standard paver walkway is often excavated 7 to 8 inches below finished height to allow room for compacted subbase, a thin sand layer, and the pavers.
What material is best for a walkway subbase?
RCA, or recycled concrete aggregate, is commonly used because it compacts tightly, drains well, and creates a stable base for residential walkways.
How long does a paver walkway last?
A properly installed paver walkway can last decades when the base is prepared correctly, the edges are restrained, and the joints are filled with polymeric sand.
Can pavers be installed over an old concrete walkway?
Sometimes, but full removal is usually better when the old surface has cracks, drainage problems, height issues, or an unstable base.
How do you keep weeds from growing between pavers?
Polymeric sand helps reduce weed growth because it hardens in the joints after proper installation and water activation.
Conclusion
How to install a paver walkway correctly comes down to the work below the surface. Grade setting, excavation, compaction, RCA subbase, thin sand bedding, square layout, concrete edging, and polymeric sand all work together to create a walkway that lasts.
Affordable Patio serves Suffolk County and Nassau County with paver walkway installation, patios, driveways, fire pits, steps, and outdoor masonry services. To get a clear estimate, visit the Affordable Patio contact page.